
![3.[iAuto Tutorials]How to Bulk Write Envelopes with iAuto Automatic Handwriting Machine](http://uunatek.com/cdn/shop/articles/21_8d02b61c-b8d3-4240-abb7-70a63de13dce.jpg?v=1752396205&width=1100)
Embark on a journey of streamlined envelope customization with the UUNA TEK® iAuto Pen Plotter. This comprehensive guide walks you through precise typesetting, layout refinement, and efficient batch production, ensuring your envelopes showcase a perfect blend of creativity and automation. Elevate your envelope game and bring your unique designs to life effortlessly.
Part 1 - Preparing for Envelope Writing:
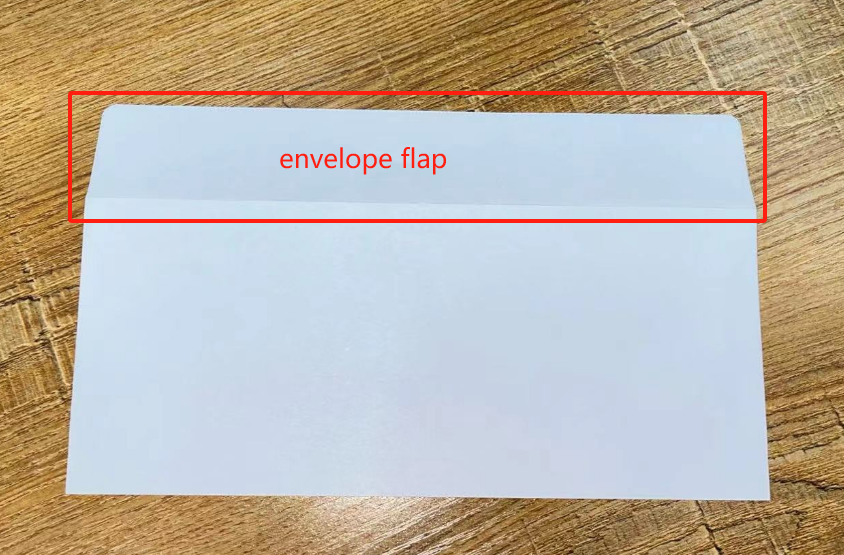
Ensure that you acquire envelopes with a wide-edge flap for optimal compatibility with the UUNA TEK® iAuto Pen Plotter. This design allows the paper-pressing wheels of the writing robot to efficiently press the envelope edge during the writing process.
Take into account the envelope flap when calculating the canvas size to be used. This step ensures that the machine accurately recognizes the actual envelope size, enhancing precision in typesetting.
Note that the flap of the envelope typically remains blank during typesetting; refrain from adding any text to this area.
Before inserting envelopes into the paper slot, unfold and flatten the flaps. This crucial step prevents paper jams and ensures that the paper-pressing wheels have sufficient space to press the envelope while writing.
Extend these precautions to other materials like greeting cards or paper. Leave a recommended 15-20mm blank space around the paper to allow ample room for the paper-pressing wheels during the writing process.
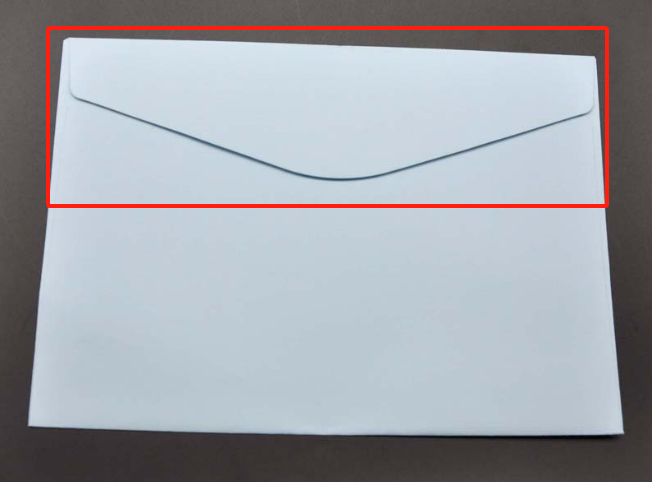
Be aware that envelopes with wide flaps are highly suitable for this process as follow:
Avoid utilizing envelopes with flaps less than 20mm in height or those featuring a triangular flap. This recommendation ensures optimal performance and prevents potential issues during the automated handwriting process with the UUNA TEK® iAuto Pen Plotter.
Part 2 - Crafting Envelope Contents:
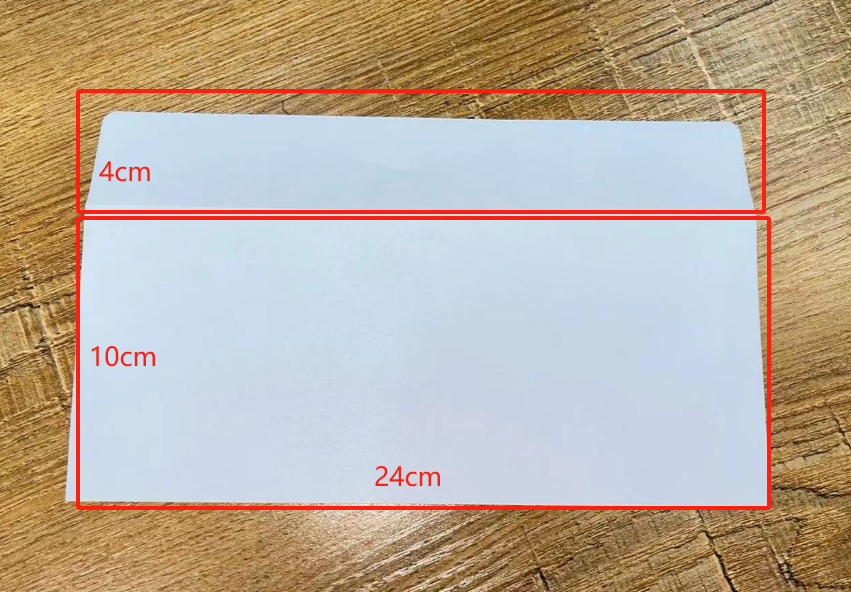
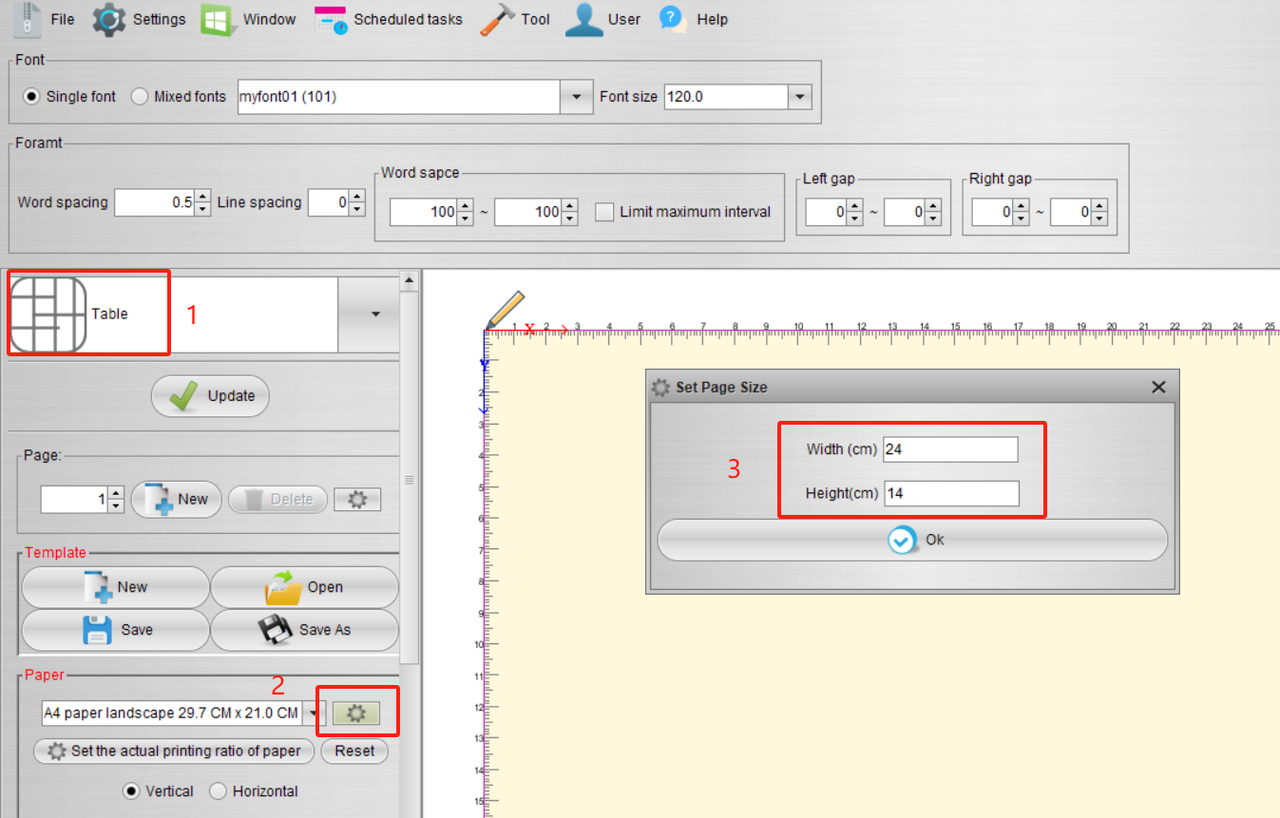
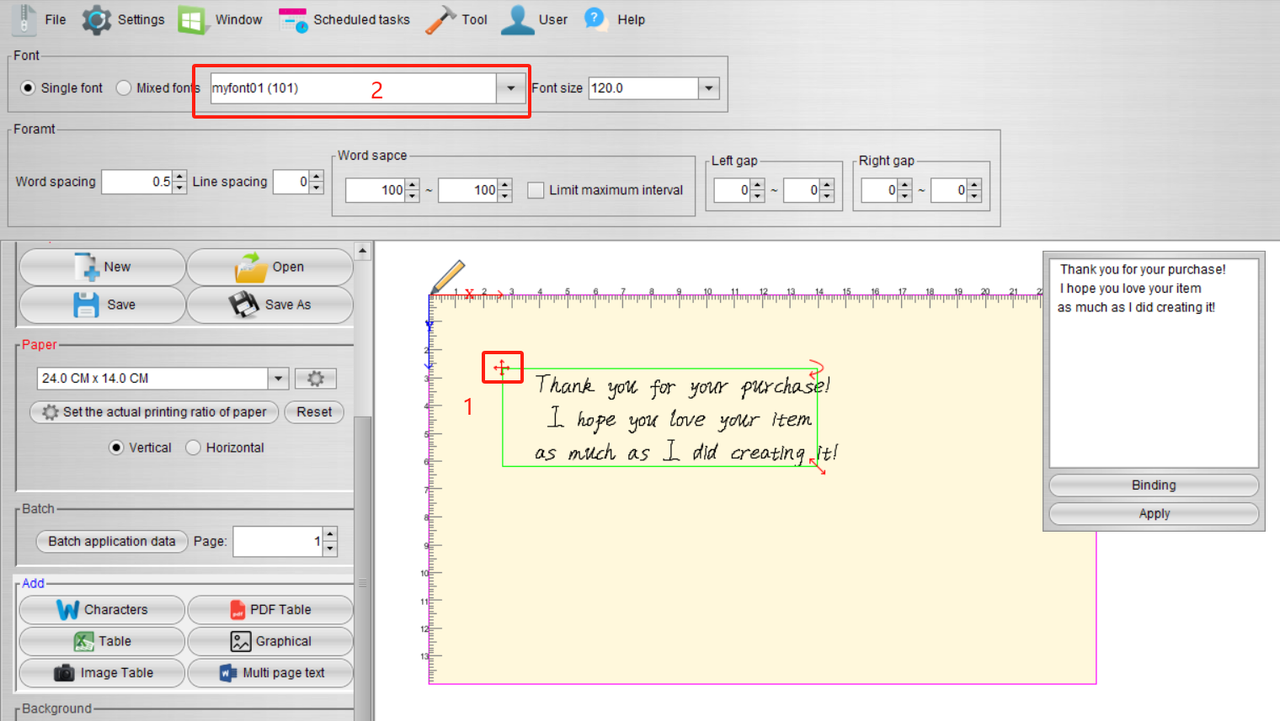
Launch the software and navigate to the Table function. Adjust the canvas size to match the dimensions of the envelope. Given the earlier specifications – an envelope size of 20*10cm (excluding the unfolded flap) with a flap height of 4cm – set the canvas size to 24*14cm. This step ensures accurate representation and alignment of your content within the designated envelope space.
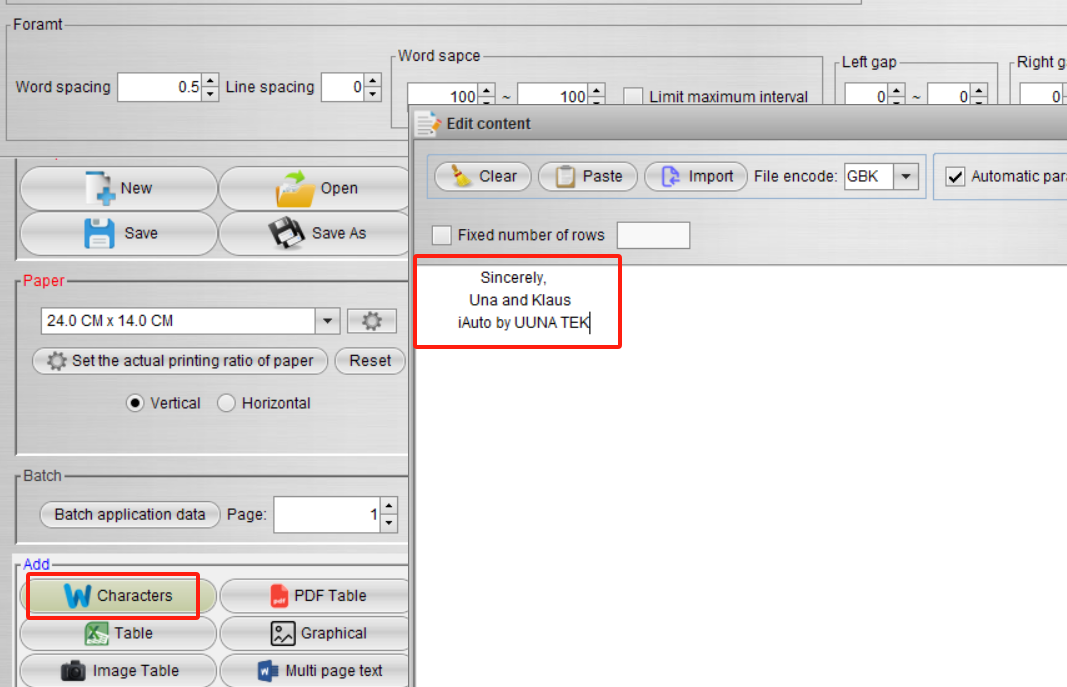
Incorporate the pre-prepared text content onto the canvas using the Characters function. This straightforward step streamlines the process of bringing your text into the designated space, enhancing efficiency and precision in your envelope design with the UUNA TEK® iAuto Pen Plotter.
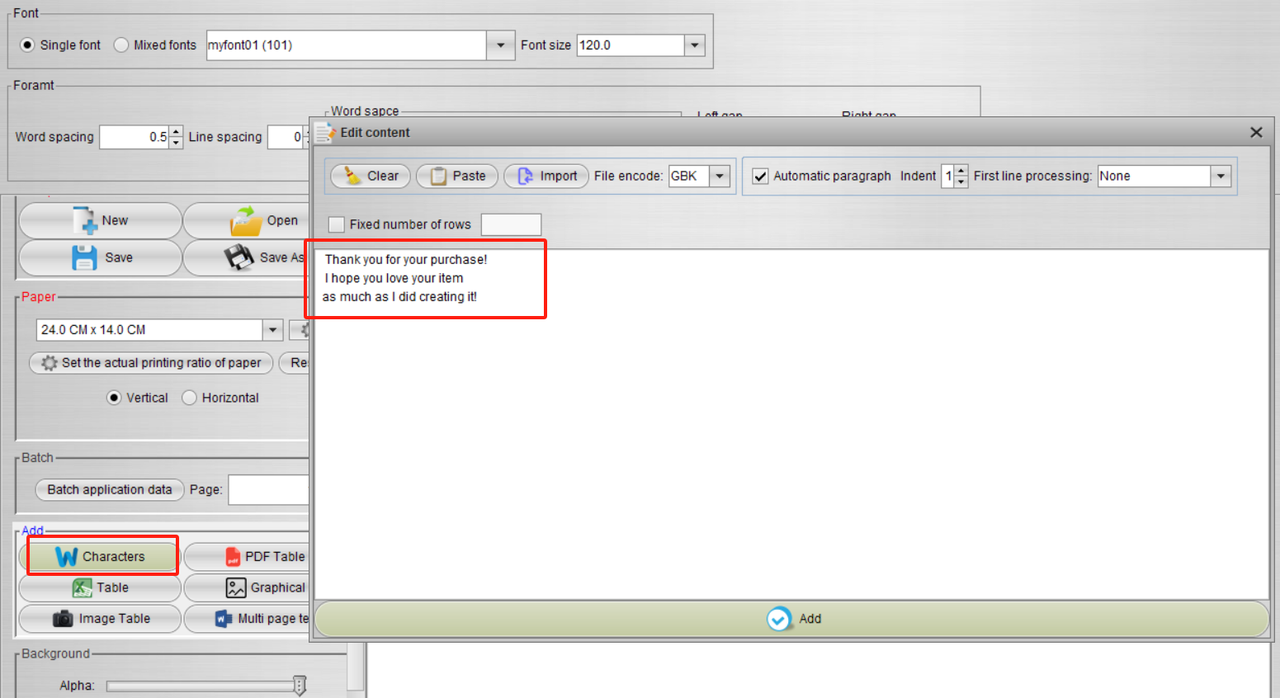
Click on the cross cursor located in the upper left corner of the text to highlight all the text. Next, navigate to the font options to seamlessly switch between various font styles. This feature allows you to personalize and experiment with different font choices, adding a touch of creativity to your envelope content with the UUNA TEK® iAuto Pen Plotter.
Furthermore, you can refine the envelope layout using the following functions:
- Font Size: Modify the text size as needed. If it appears too small, feel free to input any value for a customized size adjustment.
- Word Spacing: Fine-tune the space between individual letters to achieve the desired visual appeal.
- Line Spacing: Adjust the spacing between lines to enhance the overall layout.
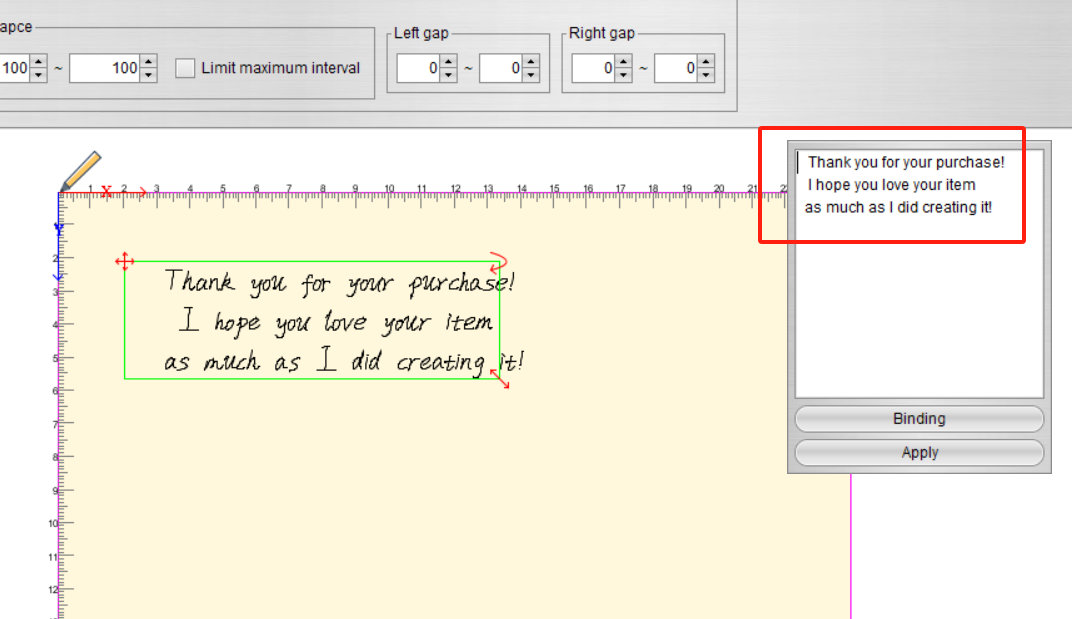
- Word Space: Regulate the space between words. The system generates random gaps within predetermined maximum and minimum values, simulating the natural randomness associated with handwriting.
- Left Gap, Right Gap: Tailor the size of gaps between the left and right boundaries and the words. Similar to word spacing, these intervals are randomly generated within specified maximum and minimum values, replicating the organic variability seen in natural handwriting. These functions collectively empower you to customize and perfect the aesthetics of your envelopes with the UUNA TEK® iAuto Pen Plotter.

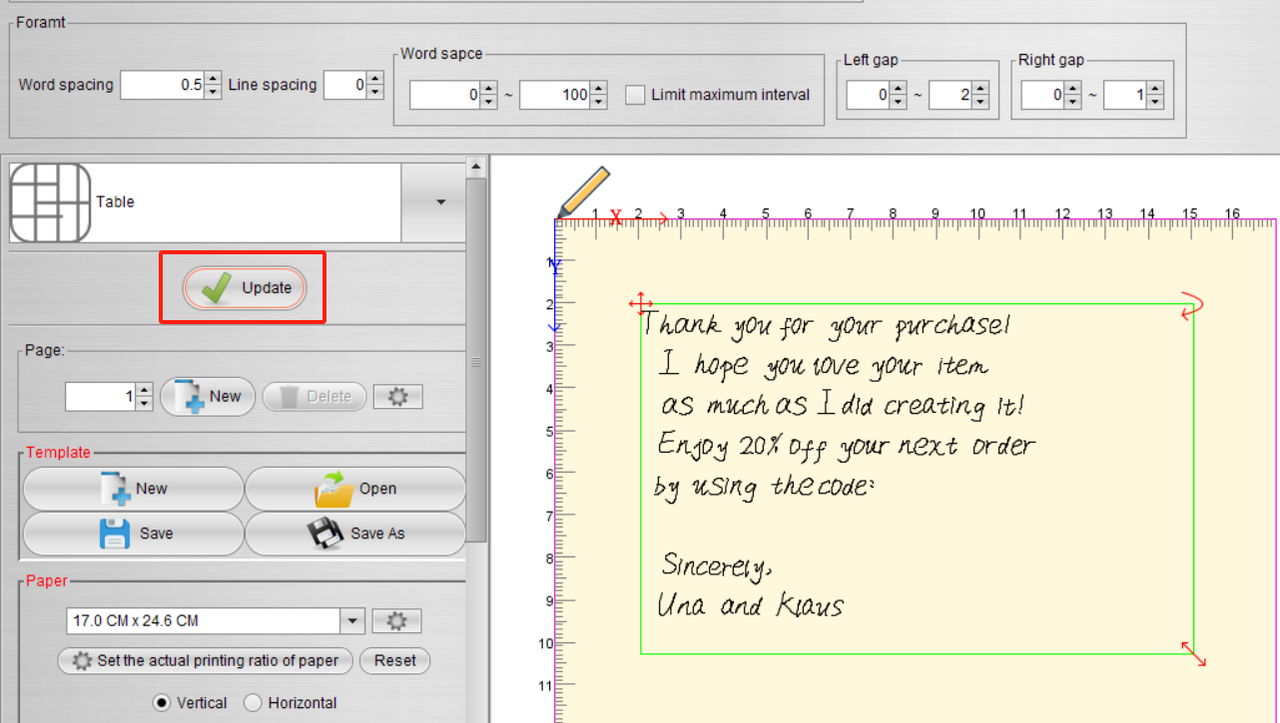
Within the options on the left, each click on the "update" button triggers the software to autonomously and randomly adjust word spacing based on the specified settings. Additionally, the software seamlessly switches fonts in accordance with the custom font style, imparting a realistic touch to the final output. This dynamic updating feature enhances the authenticity of the generated content, ensuring a more realistic and visually appealing effect with the UUNA TEK® iAuto Pen Plotter.
Similarly, you can swiftly modify the text and refine the layout in a manner reminiscent of Microsoft Word. This user-friendly interface allows for easy and familiar adjustments, streamlining the process of perfecting your content layout with the UUNA TEK® iAuto Pen Plotter.
Additionally, we've implemented algorithms for randomly adjusting text angles. Should you find that the generated effect is not satisfactory, consider tweaking the automatic adjustment range. This parameter can be conveniently adjusted in this section, providing you with the flexibility to fine-tune and optimize the visual appeal of your text with the UUNA TEK® iAuto Pen Plotter.

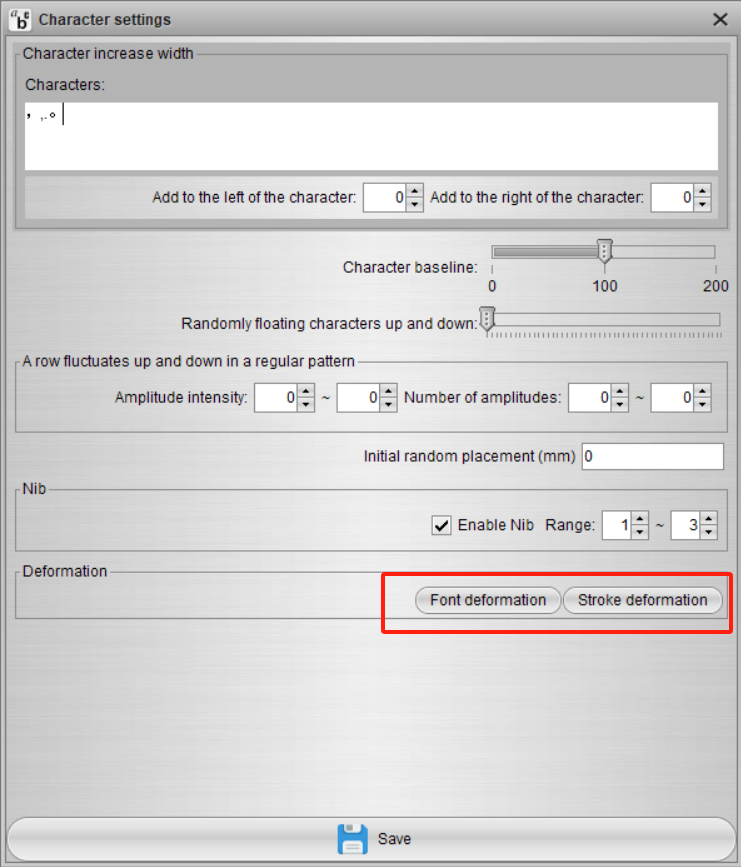
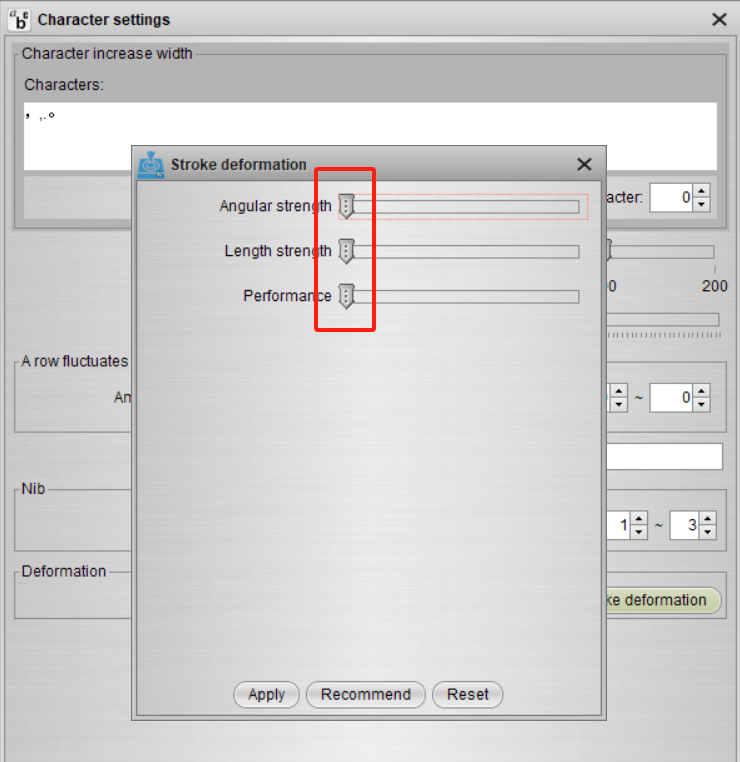
For optimal results, it is recommended to set the parameters in Stroke Deformation to the minimum values. This adjustment ensures precision and reduces any unwanted distortions, contributing to a cleaner and more refined output when utilizing the UUNA TEK® iAuto Pen Plotter.
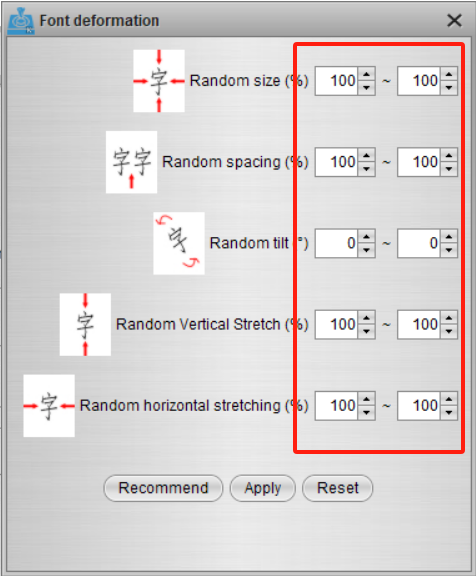
Ensure the text size in Font Deformation is set to 100% without scaling for a consistent and unaltered appearance. This adjustment maintains the intended size and visual integrity of your text, enhancing the overall quality of your output with the UUNA TEK® iAuto Pen Plotter.
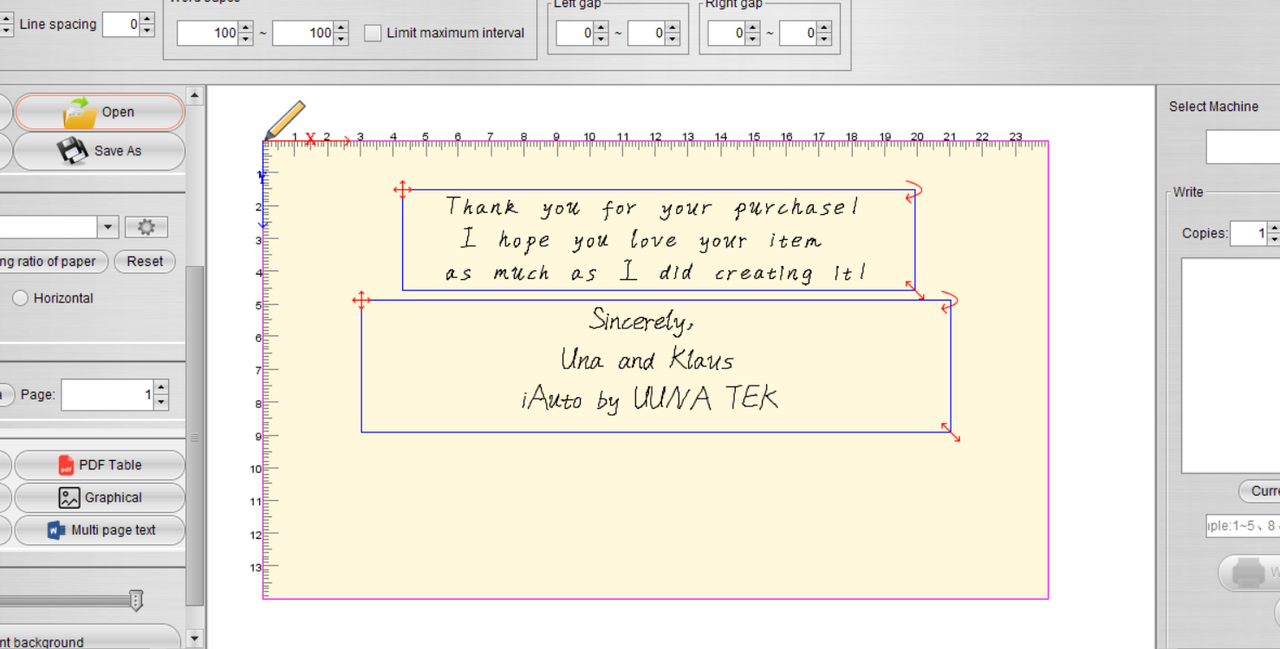
Following the aforementioned steps, you can effortlessly incorporate multiple paragraphs of text for comprehensive typesetting. The intuitive process enables you to seamlessly organize and design your content with the UUNA TEK® iAuto Pen Plotter, providing flexibility and efficiency in creating diverse and engaging layouts.
Here is the final layout after implementing the described steps:
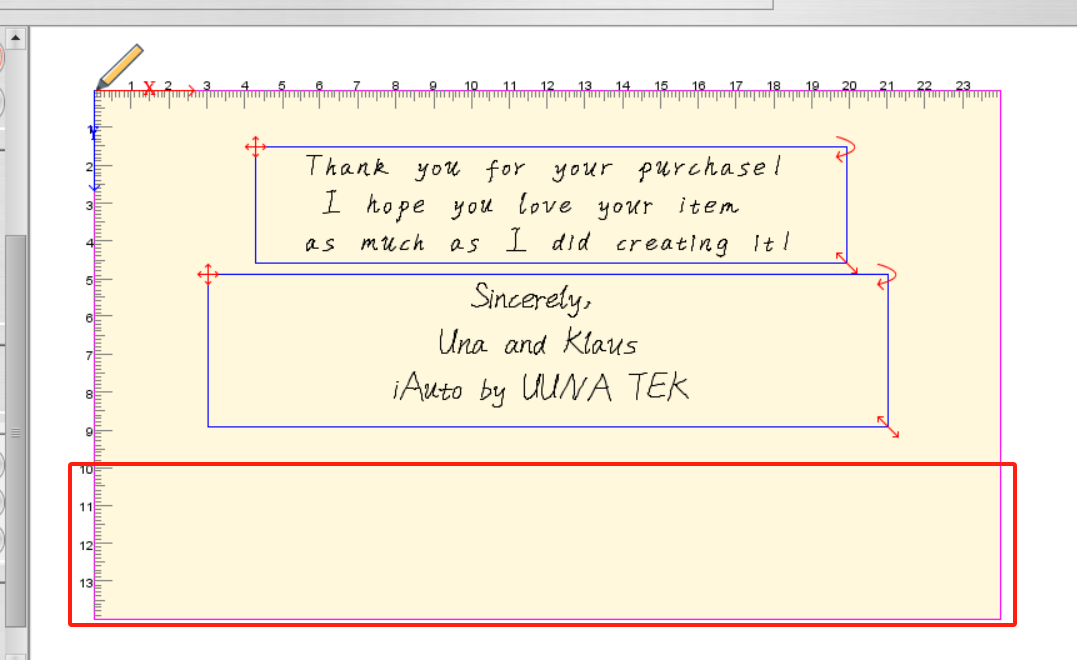
Please note that the flap section, highlighted in the red box below, should be left blank and not included in the typesetting process:
Part 3 - Initiating Batch Production:
Now, let's move on to batch production of the envelopes. Follow these steps:
-
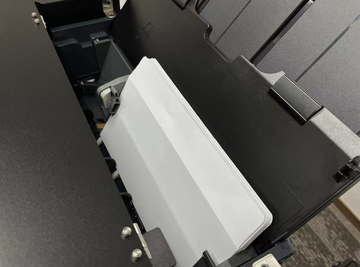
Position the envelope upside down in the paper feed slot. It's essential to note that the actual writing starting point is at the lower right corner of the machine.
-
Adjust the buckle position to match the width of the envelope. This ensures proper alignment and smooth processing during the batch production phase with the UUNA TEK® iAuto Pen Plotter.
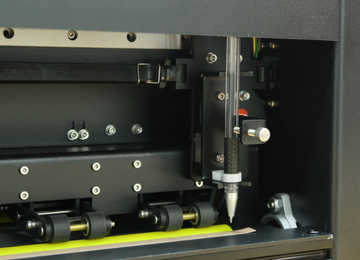
Install the pen:
Click on "Current" to generate the G-code for the current file. Afterward, set the quantity to be written. This step finalizes the preparation for batch production, allowing you to customize the number of envelopes to be processed by the UUNA TEK® iAuto Pen Plotter.
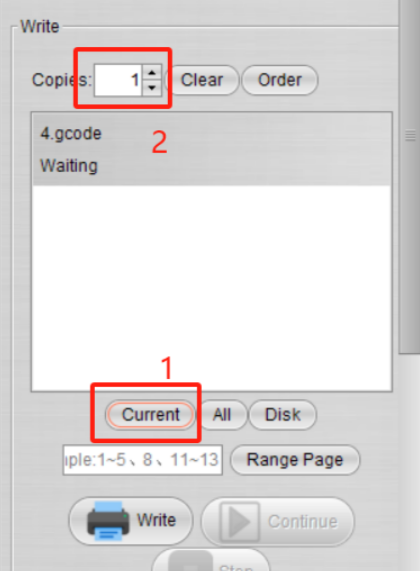
Once all preparations are complete, simply click the "Write" button to initiate the production process. This command sets the UUNA TEK® iAuto Pen Plotter in motion, bringing your meticulously designed envelopes to life in a swift and automated manner.

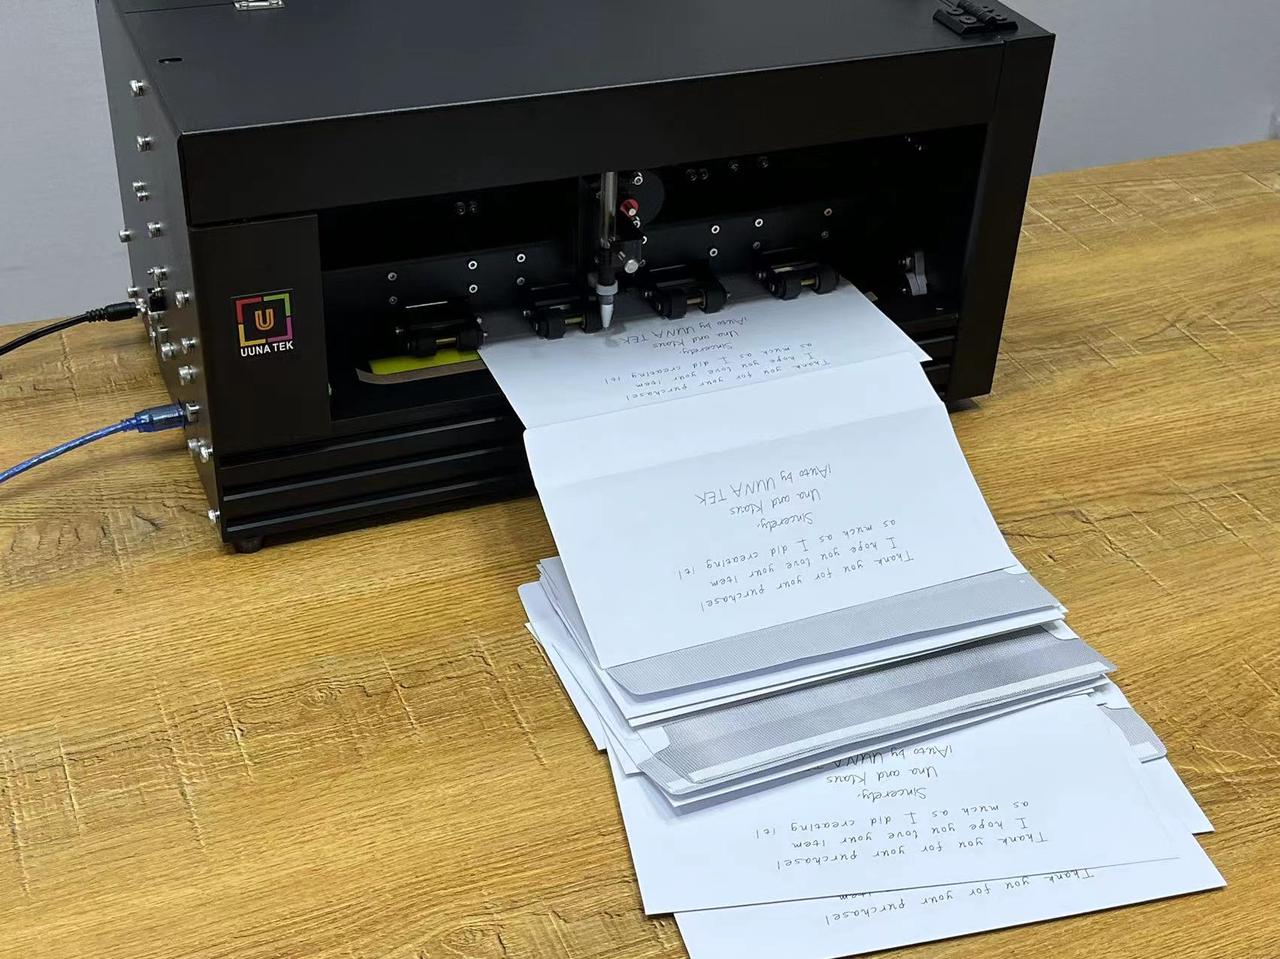
Here is the final result:
More related articles about iAuto:
- How to Automate Bulk A6 Card Writing with UUNA TEK iAuto Automatic Writing Machine
- How to Automate Bulk #10 Envelope Writing with UUNA TEK iAuto Automatic Writing Machine
- Top 10 Tips to Avoid Paper Jams with iAuto Automatic Writing Machine
- Get Thousands of Font Variaties with Font/Stroke Deformation Function
- Bulk Writing with iAuto Pen Plotter: Opening and Utilizing TXT or Word Files with Selected Fonts
- [iAuto Tutorial]Converting Text to SVG with Inkscape for iAuto Pen Plotter
- [iAuto Tutorial]Auto Wedding Invitation Production: A Guide with iAuto for Valentine's Day
- [iAuto Tutorials]How to Install the software for UUNA TEK® iAuto Pen Plotter
- [iAuto Tutorials]How to Achieve Automatic Bulk Writing Using Various Fonts with iAuto Pen Plotter
- [iAuto Tutorials] How to Register and Connect to UUNA TEK® iAuto Pen Plotter
- [iAuto Tutorials]How to Make Bulk Greeting Cards with iAuto Auto Feeding Pen Plotter