This guide will walk you through the process of connecting your
iAuto Automatic Writing Machine to your WiFi network, allowing you to control the device wirelessly from either a Windows PC or Macbook. By following these steps, you can set up a seamless connection and enjoy the convenience of controlling your machine without the need for a USB cable.
Tips: The wireless connection machine only supports 2.4G WiFi
Part 1 - How to Connect WiFi to iAuto Automatic Writing Machine
Before you begin, make sure your computer is connected to a 2.4GHz WiFi network. Then, connect your iAuto device to your computer using a USB cable.
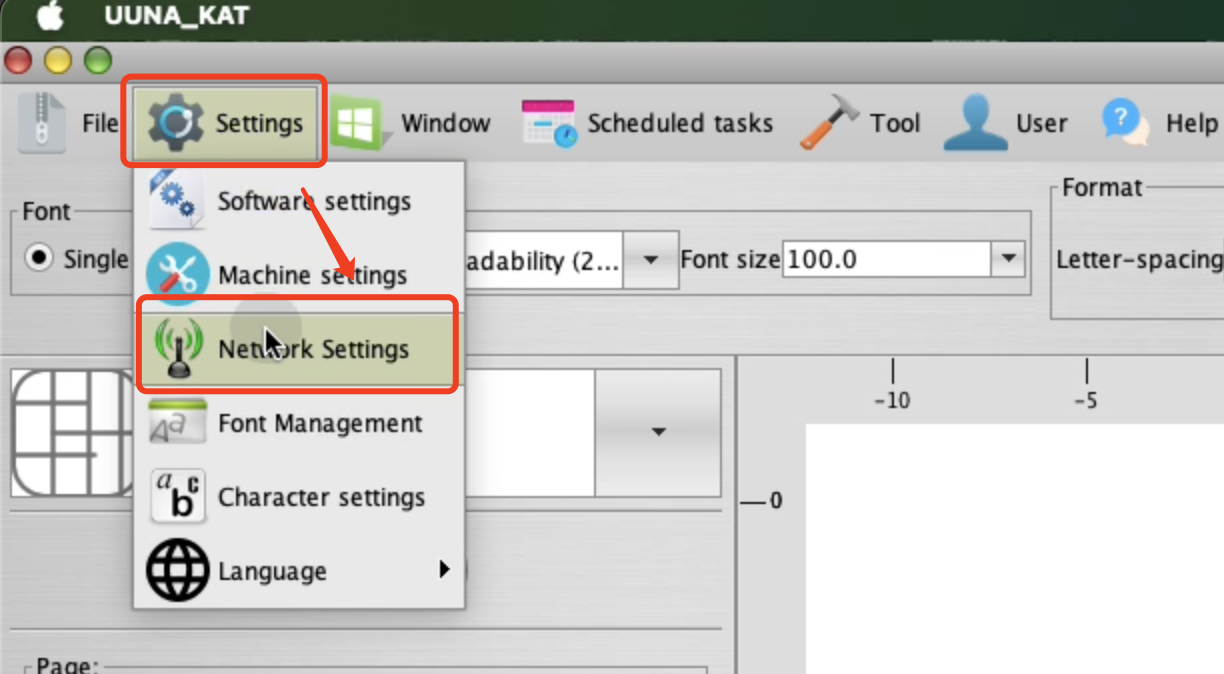
1.Open the software and navigate to Settings > Network Settings.
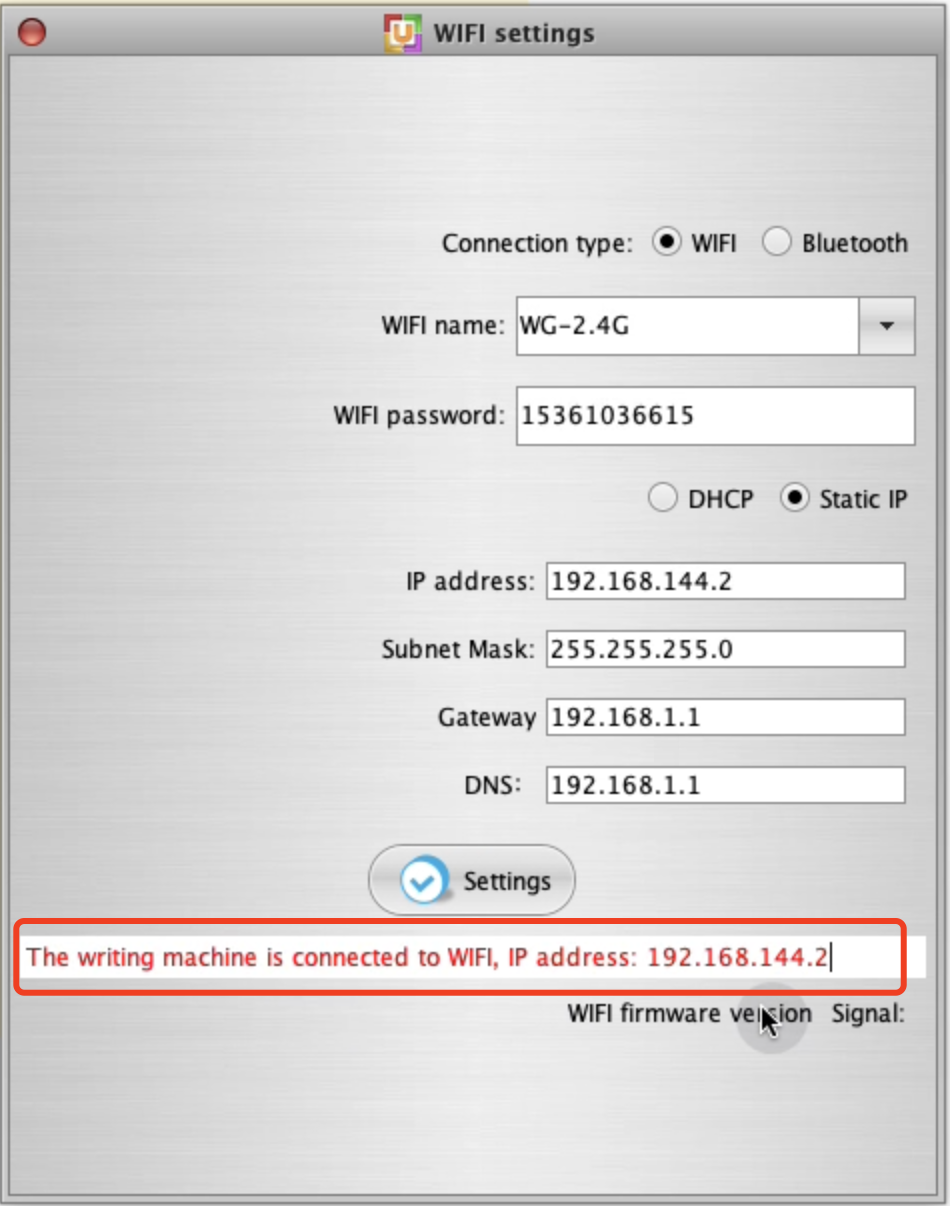
2.In the pop-up window, you will see a red message displaying: "The writing machine is connected to WiFi, IP address: 192.168.144.64". Copy this IP address.
3.Close the pop-up window and return to the main screen of the software.Click on the gear icon on the right side and select “Select Machine”.
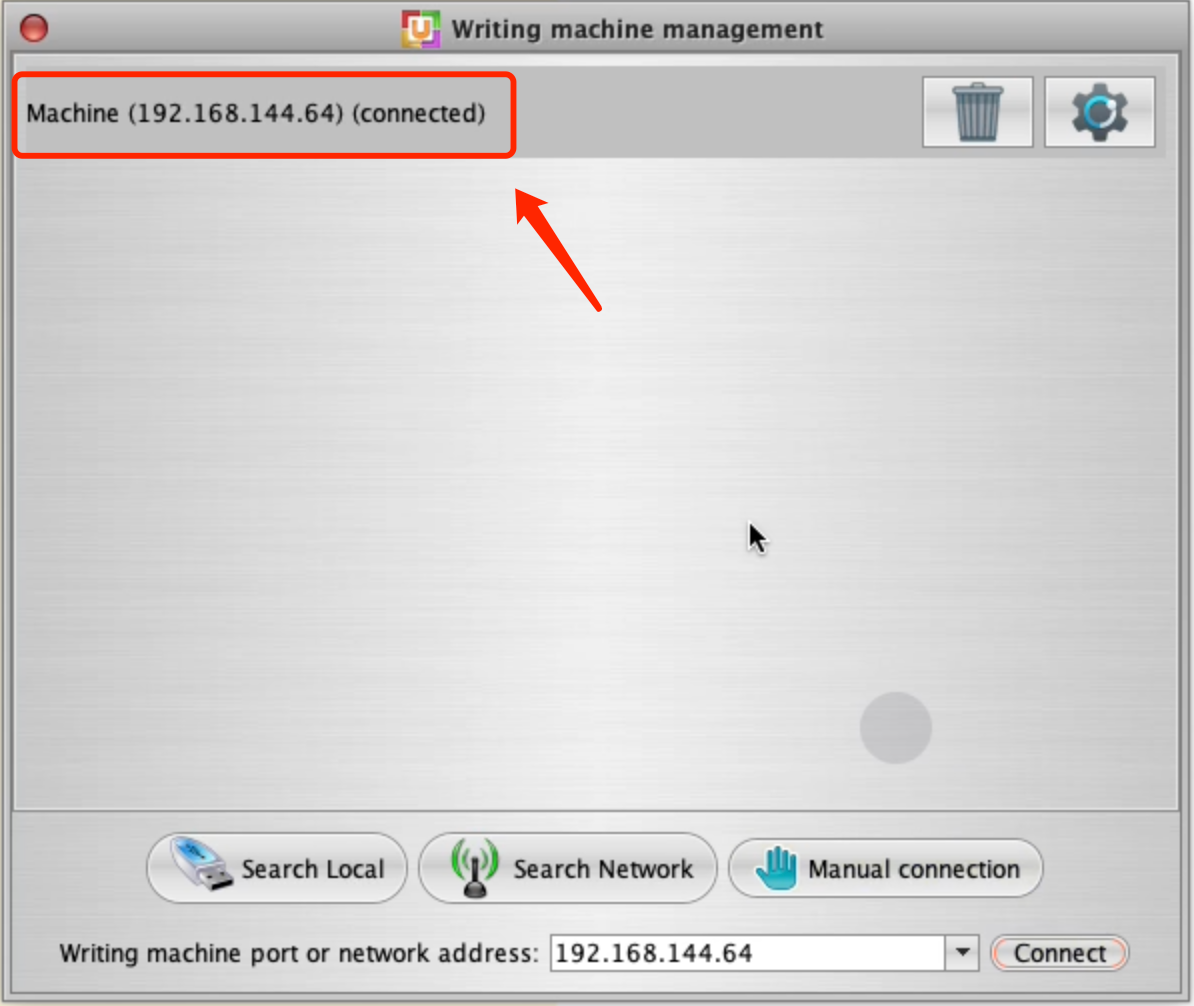
4.In the next pop-up, click Manual Connection. Delete any existing content in the input box and enter the IP address you just copied, then click Connect.
•Note: If you cannot see the Connect button, try dragging the right edge of the pop-up window to reveal it.
Once connected, you will be able to control your iAuto machine via WiFi.
Part 2 - How to Control Multiple iAutos with WiFi
If you need to connect multiple devices through WiFi, we recommend assigning unique IP addresses to each device for easier identification. Follow these steps:
1.Connect the desired machine to your computer via USB. Then, open the software and go to Network Settings.
2.Set the Connection Type to WiFi. In the input field below, enter the WiFi name and password of your current network. Ensure that the WiFi is 2.4GHz, as the machine will not recognize a 5GHz connection.
3.Select Static IP, and in the pop-up IP Address field, enter the IP address you want to assign to the device (e.g., 192.168.144.2).
○You can modify the last digit (after the final dot) to any number between 2 and 254.
4.Set both the Gateway and DNS fields to 192.168.1.1.
5.After completing these settings, click Settings. The software will disconnect from the current connection and attempt to reconnect to WiFi.
6.Once the connection is successful, a red notification will appear, confirming that the machine is connected to WiFi with the IP address you just assigned.
7.Close this window and open the Select Machine window.
8.Click Manual Connection, enter the newly assigned IP address, and click Connect.
9.Once the port name in the top connection status bar changes to the new IP address, you can confirm that the device is now connected via WiFi.
10.At this point, you can click on the gear icon to change the name of your device for easy identification. After renaming, you’ll also see the updated name in the main connection window.
Part 3 - Important Tips:
•Always ensure that your computer is connected to a 2.4GHz WiFi network when setting up a WiFi connection for your device.
•During the setup process, the machine must be connected to the same WiFi network as your computer.
•To avoid potential conflicts with serial port recognition, disconnect the USB cable once your machine is connected via WiFi.
Summary
In this tutorial, we covered how to connect your
iAuto Automatic Writing Machine to WiFi for wireless control. After ensuring your computer is on a 2.4GHz network, we detailed the steps for both single and multiple device connections, including assigning unique IP addresses for easier management. By following the steps outlined, you can effortlessly control your iAuto machine via WiFi, with tips to avoid common setup issues and ensure smooth operation.
More related articles:


