

This article is contributed by @Frank Lohmann
Wall printers that print colorful pictures on the wall are being used more and more often. I really liked the idea of creating a picture in front of our guests. After searching and finding appropriate systems, it quickly became clear that such a printer would be too expensive. Painting the wall white before each new print was also quickly discarded. So I kept looking and came to Penplotter. Several more searches brought me to the iDraw H A1 Size Pen Plotters from UUNA TEK. I liked right away that there were sizes from A4 to A2.
For our purposes, the A1 size was just right. Ordered over the official UUNA TEK iDraw shop and delivered quickly, this was a very good start.

The assembly was not a porbem with the enclosed USB stick, which left no questions unanswered with videos.
The next steps to install the idraw 2.0 drivers in inkscape turned out to be just as easy. The required software was also on the supplied USB stick. So I was able to start a first plot less than 30 minutes after the start of the assembly. I was and am thrilled.
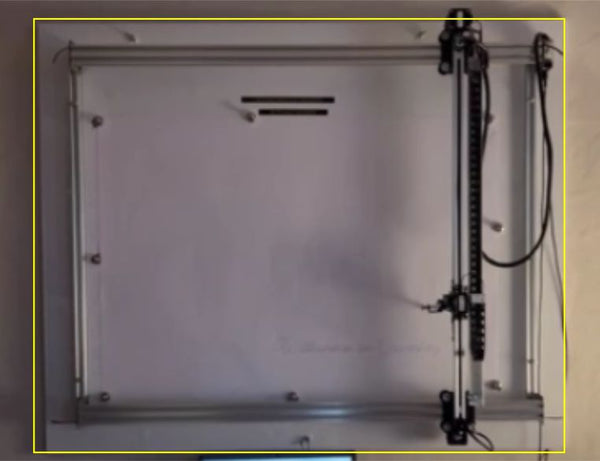
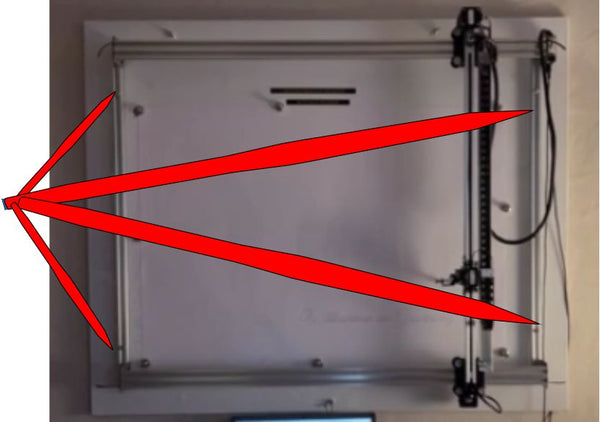
Since plotters are designed for horizontal work, it is necessary to consider in advance what is possible. The iDraw H Pen Plotter has a heavy Y-axis with 2 motors, a lightweight X-axis with one motor and an even lighter Z-motor.
Through trials, we found that the Y-axis is too heavy for vertical printing. You can only hang the plotter horizontally and not vertically on a wall.
The heavy weight of the Y-axis causes the plotter head to go down too quickly when exiting. This would quickly result in damage. The X-axis is borrowed enough and runs slowly enough to return to the starting position after the plot process is finished. This way, no damage is caused.
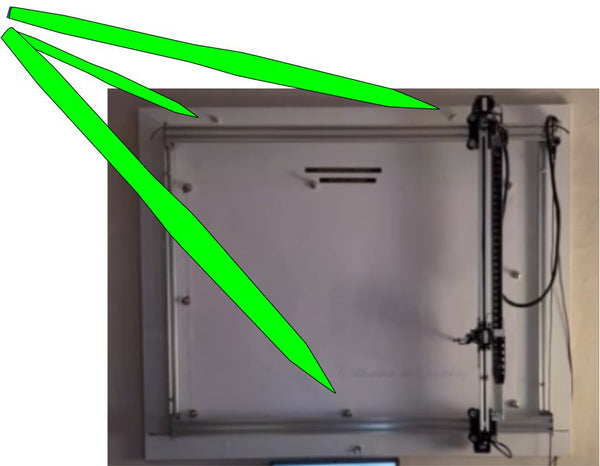
The pen holder must be facing downwards at a 30-degree angle. This is the only way to optimally supply a pen with paint without running dry. Without inclination, not enough colors can run after the tip.
The plotter must be firmly attached to a smooth plate and stably attached to the wall. The actuators generate a lot of movement during plotting.
Since our plotter is in public space and accessible to guests, we bought a cheap notebook 250€ with Windows. It only runs inkscape and the notebook has the same access to the Internet. This allows us to minimize security from viruses and guest access. Additional password protection locks the notebook. We load data via USB stick.
Software about Vertical Plotter Set Up
We work with inkscape and DrawbotV3 to vectorize images and adapt them to the plotter.
Especially Drawbotv3 offers possibilities to encode a file with several colors. Later, the software saves each color individually and can be called up little by little in inkcape to educate multicolored plots. We decided to rotate imported image or svg files by 90 degrees and set the document setting to portrait. Our plotter hangs in the restaurant and guests should follow the creation of a file throughout their visit to the restaurant. More on this later from step 5.
How to Plot Verically with iDraw H Pen Plotter
Step1 - Find a Suitable Panel
As a base for the installation on a wall, we use a 25mm thick coated smooth wooden panel.
The size depends on your plotter. Measure your plotter (width and height) and buy the wooden board 2-4 inches larger. For our A1 plotter with the dimensions 37.4 x 34.45 x 6.1 inches we bought a plate with 43 x 38 inches.
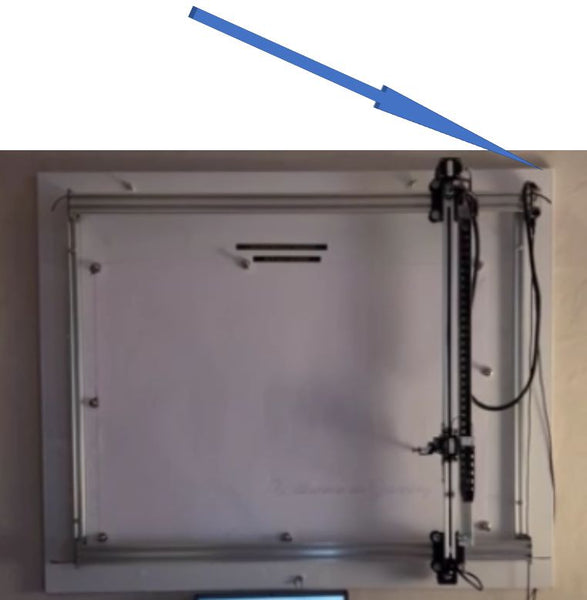
Step 2 - Mount the Pen Plotter to the Panel
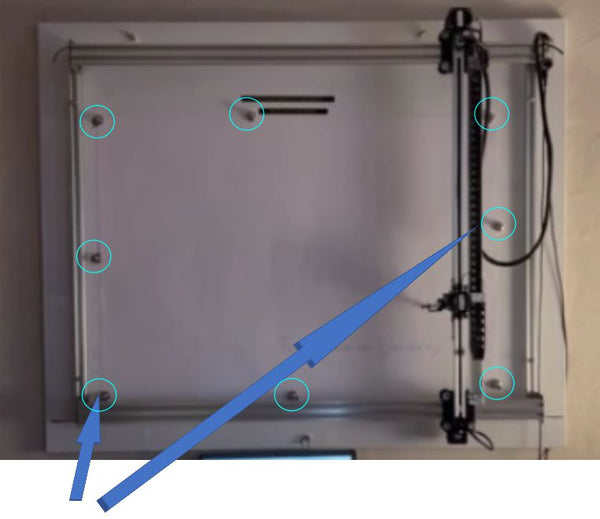
In the right and left guide rails of your plotter (the rails that connect the two Y-axis rails) we drill 4 holes with a distance of 8 cm from the ends. Diameter 6 mm.
Place the mounted plotter on the wooden plate and drill through the 4 holes of the guide rails to fit precisely into the wooden board. (Attention: the controller must be in the top right. For example, the starting point of the plotter at the bottom right matches the inkscape settings.
Next, mount the plotter firmly to the wooden board with 4 screws (5mm) and appropriate nuts.
Now we need 3 holes of 8 mm each in the wooden panel, through which we can firmly attach the panel to a wall. Drill 2 holes at the top and 1 hole at the bottom (8mm). At the top at a distance of 6 inches from the edge, the bottom hole should be centered in the plate. Appropriate screws now attach the plotter to the wall.
Step 3 - Connet Your Plotter to Devices that Runs Inkscape
Now connect your plotter to the mentioned notebook or a source of your choice that runs inkscape via USB cable.
After an initial test run, use a pen to mark the exact position of the sheet on which you want to plot. Now you can glue magnetic, self-adhesive metal discs to the wooden board. Attach the paper with tarken magnets. Thus, the blade is very well fixed vertically.
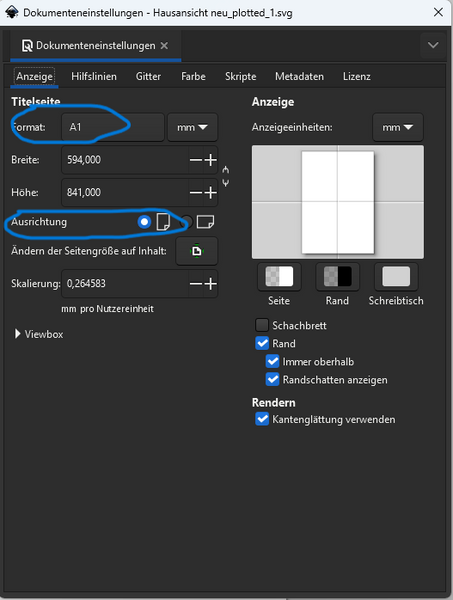
Step 4 - Inksacpe Setting
Start inkscape, set the size of your plotter in the document properties. With us A1. For us, the orientation must be portrait as image.
Step 5 - Import a File You Want to Write or Draw
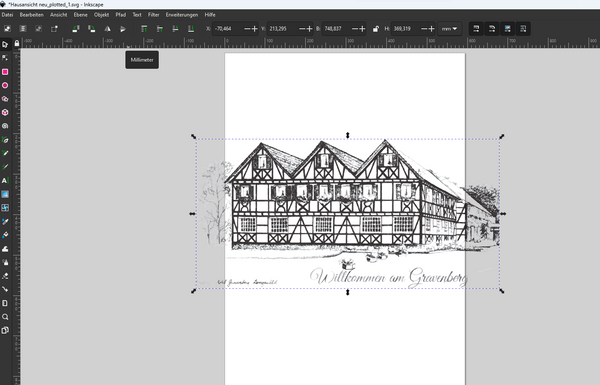
Import a corresponding image and edit it by creating paths or loading an svg file. Detailed descriptions of how to create or import can be found on the WEB.
I also like to work with DrawbotV3 to edit images. There is also a free version on the net, which is very suitable for getting started.
Adjust a desired size in inkscape. Create font with the corresponding function, Convert the font to paths, and then fill the text with idraw utilities "Hatch fill".
Step 6 - Match The Plotter Starts on the Wall at the Bottom Right
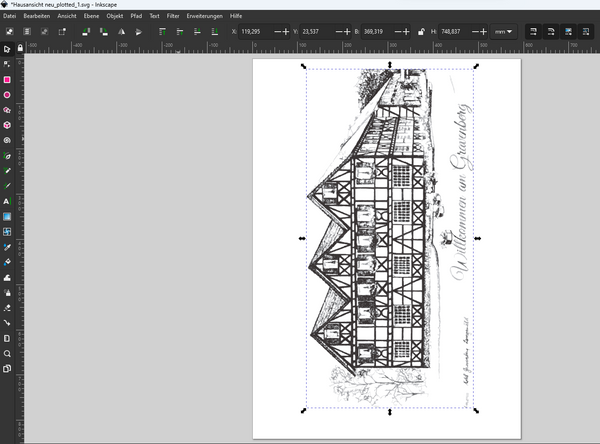
The starting point in the document is then at the top right of the screen. The plotter starts on the wall at the bottom right. Due to the vertical attachment to the wall.
We quickly realized that normal plotters can't write pens or felt-tip pens long enough on a plotter of our size. There is not enough ink. This may be sufficient for technical drawings for which plotters have been developed once. However, with images that we build up with software, also stitches and endless lines, fast kilometers of writing paths for a pen are created. Ballpoint pens or ball pens have proven to be the best so far. We are currently working on creating the images in multiple colors in several passes and with different colors.
We have the plotter on the wall for 3 weeks now, our guests are happy to see a "work of art" created every day. Setting pot speed is a notable advantage of plotters. In this way, we can slowly create images in front of the eyes of the guests in 20 minutes or even in 8 hours.
Summary
In conclusion, the iDraw H Pen Plotter from UUNA TEK emerges as a commendable solution for vertical wall art creation, offering versatility, ease of setup, and seamless integration with software tools like Inkscape and DrawbotV3. Its robust construction, coupled with thoughtful design considerations for vertical printing, ensures stable and precise performance. By following the outlined steps in this guide, users can harness the full potential of the iDraw H Pen Plotter to produce captivating and multicolored artwork effortlessly. With its ability to transform any space into a canvas for creative expression, the iDraw H Pen Plotter stands out as a highly recommended choice for enthusiasts and professionals alike.
More Related Artices:
- Gcode Setting Up for iDraw CNC Pen Plotter Writing Machine
- Top 5 Budget-Friendly Alternatives to Axidraw Pen Plotter
- UUNA TEK Sponsorship: iDraw Features in Makoto Inoue's Show
- Unveiling Axidraw Pen Plotter Machines | UUNA TEK
- Handwriting Robot: Discover the iDraw H Pen Plotter|UUNA TEK
- How to Draw Digital Art with an UUNA TEK iDraw Pen Plotter? | UUNA TEK