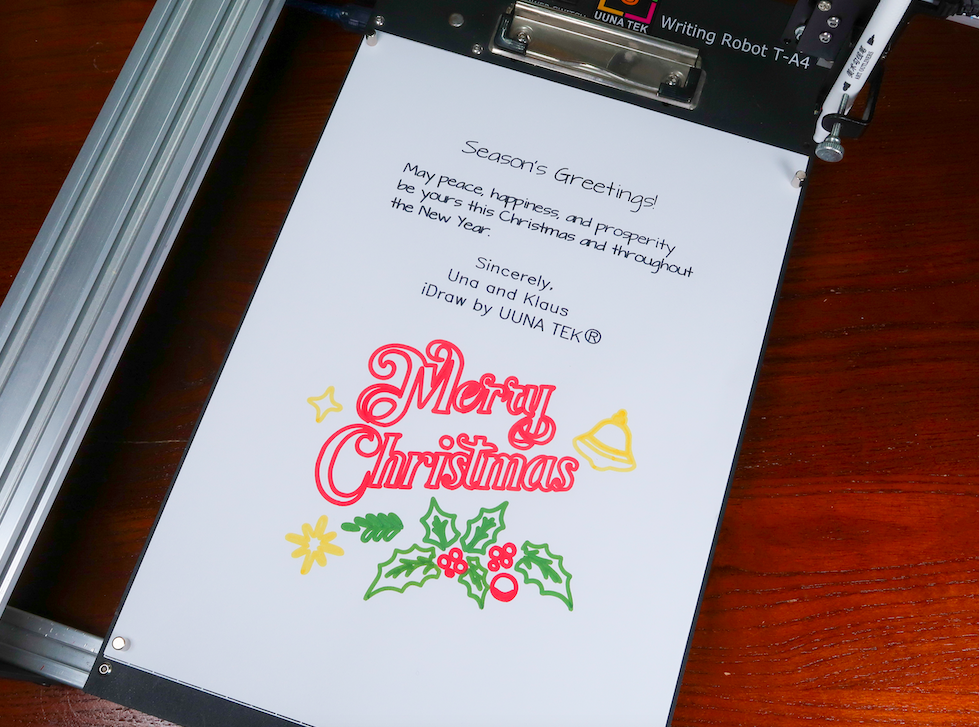
Dive into the festive spirit as we explore the art of creating personalized Christmas greeting cards. In this comprehensive guide, learn how to generate theme materials using ChatGPT's text-to-picture function, design SVG files with Inkscape, and bring your creations to life with the UUNA TEK® Pen Plotter. From classic Christmas elements to unique fonts, discover the creative process behind crafting one-of-a-kind cards that spread holiday cheer. Follow our detailed steps, complete with images and instructions, to make this Christmas truly special with handmade greetings for your loved ones. Merry Christmas to everyone!
1. Generate theme materials
First, generate some corresponding materials. Here you need to use ChatGPT's text-to-picture function. We can write the prompt like this: "Christmas is coming, and I need to make some greeting cards. Please generate some suitable illustration materials for me, which need to contain classic Christmas elements." After many attempts, I got the following exquisite materials:
At the same time, we can also try to generate different Merry Christmas English fonts and create unique exclusive fonts:
Very creative!
2. Use Inkscape to create SVG files
After generating the materials, we need to use Inkscape to design and create greeting cards.
First, you need to convert the material into an SVG file that can be drawn by UUNA TEK® Pen Plotter Pen Plotter.
1. First import the image into Inkscape through the Import function under the File option.
2. Then turn on the trace bit map function:
3. Set the parameters, usually the default is enough, and then click Apply to convert the image into an SVG file (outline file):
In order to see the conversion effect clearly, we can switch the display mode to outline mode:
You can see the real effect after conversion:
4. Double-click the generated outline to edit the path and choose to delete the parts you don’t need and keep only the materials you need:
Through the above method, we get the material we want.
This is what it looks like in normal viewing mode (I added corresponding colors to different materials):

Finally, let’s add some blessing text. After entering the text, we use the Hershey Text function to convert the text into the font we like:

Then combine all the above materials to design the final effect:
3. Of course, if your greeting cards are of different sizes, you can set the size of the entire canvas according to the size of the greeting card.
Let’s open the page settings:
Use the custom function to set the size of the greeting card (I set it to 150mm*200mm here):
Then adjust the size of the material to the appropriate position:
Of course, you can also directly draw two rectangles on the A4 canvas for positioning (each rectangle is half the size of the greeting card), such as this:
Then place the rectangle in the upper right corner of the canvas to position the final drawing position (it is recommended to be the upper right corner, because this is the origin of UUNA TEK® Pen Plotter, which is more convenient for placing greeting cards):
At the same time, there is a little trick, you can use the scale lines that come with Inkscape to help us better check the painting effect and position.
We put the mouse anywhere on the scale bar above or on the left, then hold down the left mouse button and drag it down to drag out the scale lines for positioning to assist in positioning the greeting card:
Then delete the above rectangle (note that it will be drawn if you don't delete it), and you can know the final greeting card position perfectly!
4. Draw with UUNA TEK® Pen Plotter
Finally, it’s time to paint. Because we need to use pens of different colors, we can put materials of different colors into different layers to achieve separate drawings. Select the corresponding material, then right-click and select the [move to layer] function to put materials of different colors into the corresponding layer:

After dividing the layers, just select the layer you want to draw first, and then hide the other layers, and UUNA TEK® Pen Plotter will only draw the corresponding content:
Finally, connect the machine and open the UUNA TEK® Pen Plotter 2.0 Control panel:
Adjust the pen height and drawing speed:
Then click apply on the main interface to start drawing:
The final effect is as follows:
Merry Christmas to everyone!
More related articles:
- Make Bulk Greeting Cards with iAuto Pen Plotter
- How to Automate Bulk A6 Card Writing with UUNA TEK iAuto Automatic Writing Machine | UUNA TEK
- iAuto Pen Plotter: Batch Writing Greeting Cards in 10 Fonts!
- Embrace Sustainability: UUNA TEK's Earth Day 2024 Initiative to Reduce Plastic Usage in Card Making | UUNA TEK

