The UUNA TEK 3.0 Pen Plotter is a versatile machine that supports various control software, including LightBurn, UGS, and LaserGRBL. LightBurn is a popular choice for precise and intuitive operations. This guide walks you through the steps to configure LightBurn for controlling your UUNA TEK 3.0, ensuring optimal performance and seamless operation.
Step-by-Step Guide
1. Add a Device:
Set up the device in LightBurn as a GRBL device.
Configure the machine origin to the rear-left corner.
Enable the Z-axis for better control over height adjustments.


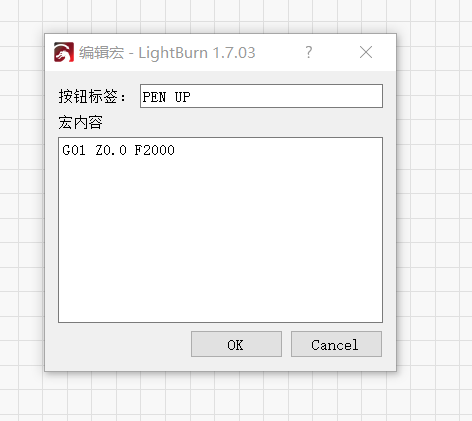
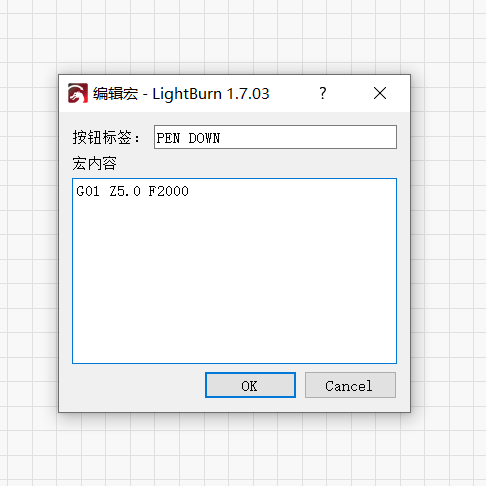
2. Add Macro Commands:
Create two macro commands, as shown in the reference image, to act as buttons for controlling the pen's movement (e.g., lowering and raising the pen).


3. Set Z-Axis Downward Height:
In the layer settings, adjust the Z-axis downward height to -3.0mm.
If there are multiple layers, consider merging all elements into one layer to simplify the process. If not, you will need to configure this parameter for each laye individually.


4. Start the Operation:
After completing the above configurations, simply click the Start button in LightBurn to initiate the plotter’s operation.
Additional Note:
For detailed instructions and visual guidance, refer to the official instructional video.

Summary:
By following these steps, you can set up LightBurn to control the UUNA TEK 3.0 Pen Plotter with ease and precision. Whether you're creating intricate drawings or performing automated tasks, this configuration ensures smooth functionality. Should you encounter any difficulties, the instructional video is an excellent resource to guide you through the process.
Let me know if you need further customization or details!


