
This article is contributed by @jim_a_g
I've been creating digital artworks for some years now and I've always been tempted by the idea of using a pen plotter to render my work as physical pieces. I almost got started plotting 10 years ago when I bought a cheap 1980s (?) A1 Graphtec plotter online, but after spending way too long messing about with SCSI and Parallel leads, DIN switches and an ancient PC I eventually gave up. I got a few plots from it but it was such a painful experience to achieve even the simplest plots from this huge, heavy machine.
It was not until 2025 that I ventured back into the world of plotting. After my graphtec debacle, I expected a struggle and a steep learning curve. To my delight, the Uuna tek H pen plotter A3 proved my worries unfounded and is a revelation for me in the realm of creative tools. Here i would like to share the detail steps to draw digital artwoks with iDraw H A3 size pen plotter drawing machine with you.
From the moment you unbox it, the setup process is a breeze. Sure, it requires assembly, but it's minimal and clear instructions are provided via a Google Drive folder (which is updated regularly). In truth, aside from tightening a few screws and plugging in some leads it’s practically plug-and-play so even if you are new to pen plotting you can dive right in with very few technical hurdles.
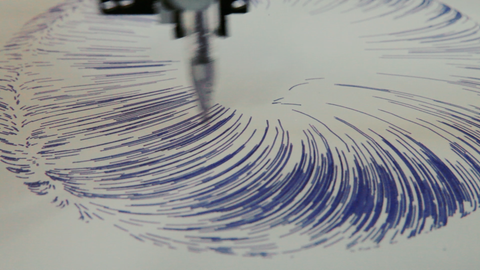
The first thing I did after putting the plotter together was to download a test plot from a repository of free-to-use SVG artworks—plotterfiles.com. I downloaded this 3D doughnut design by @illus0r Ivan Dianov.

My long-term aim is obviously to plot my own artwork but first I wanted to test the plotter with some kind of interesting geometric pattern and get to know Inkscape a little.
Inkscape is an open-source vector art program—like Adobe Illustrator or Affinity Designer and it is the software which I use to communicate with the plotter. If people are using processing or code to generate visuals then I’m sure there are other ways to send your work to the plotter but because my pieces are all created without code Inkscape makes the most sense. I’ve been working with Adobe Illustrator for years (I need to make the break from Adobe really, but it's so ingrained in my workflow that it's daunting, but that's a whole other story) so I’m no stranger to vector software and Inkscape was pretty easy to pick up despite its many differences. Even if you’re new to vector software though, it’s not hard to learn and there are plenty of tutorials on YouTube. One great feature of Inkscape is its extensions. One of these is the iDraw pen plotter extension which allows full control of the plotter (obviously kind of useful!). It allows you to do basic things like return the pen carriage to its home position and test the pen up/pen down. It also allows you to plot your whole artwork or specify individual layers and there's a useful tool for hatch-filling solid shapes—something you'll need to do if you want to replicate a fill. The Inkscape site has a whole library of other interesting extensions—things like barcode generators and Guilloche pattern generators—which you can download for free.

So, I downloaded the SVG, opened it in Inkscape and sent it to plot. And here (yes, this soon) is where I made my first rookie mistake. I hadn't specified which plotter version I was using in the iDraw Inkscape extension. By default, it is set to the A4 model and because I am using an A3 plotter, my plot came out cropped. This is a relative beginner mistake, one that I'm sure many people rushing through the instructions miss, but errors like this do help to illustrate one aspect of the nature of plotter art. The problem solving. There is lots of experimentation. From the physical media, pens, papers and techniques to software decisions like path directions, layer orders, and spacings; and then sometimes, just when you think you've got all that right you'll make the most elementary mistake (like having your plotter model set to A4 rather than A3) and only realise mid-plot. It's a game of trial and error, but it's a fun game to play and there is a synergy between the digital software and the physical, tangible output that can really empower artists to explore a wide range of creative possibilities. I lay awake in bed thinking about the materials and plots I could create.

After setting my plotter model correctly I re-tried my plot using some basic A3 paper and one of my daughters' sparkly purple gel pens. I was vibrating with excitement as I watched the plotter meticulously execute each stroke. This tactile engagement with the artistic process adds a new dimension to digital creation for me, bridging the gap between the virtual and physical worlds. It set my mind racing about what I could plot next.

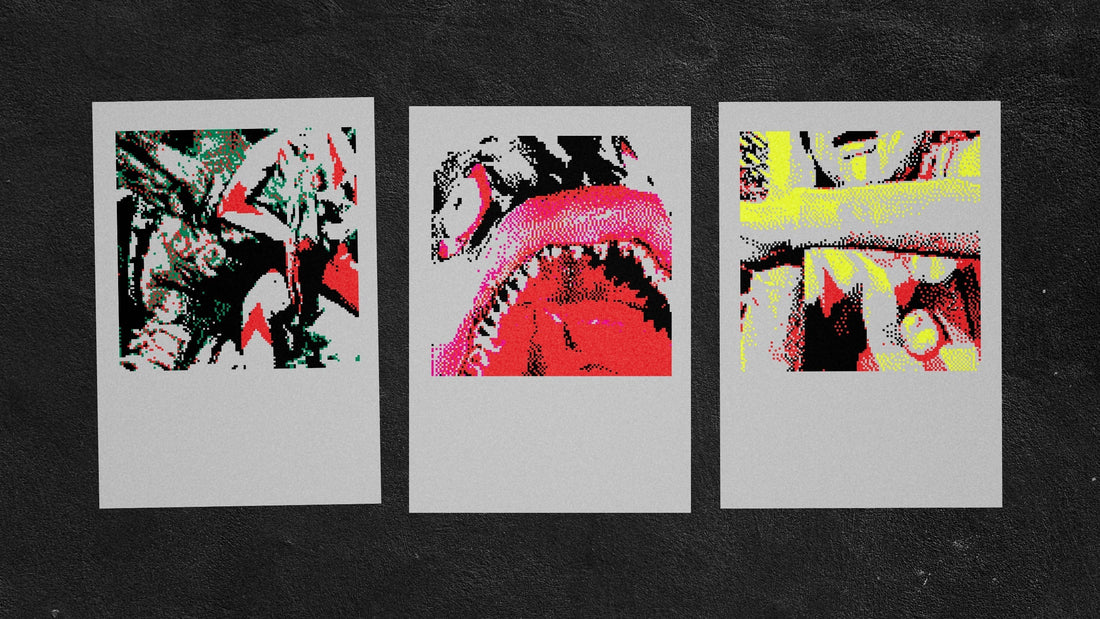
I have been working on some pieces inspired by Kaiju and more specifically the original Japanese Ultraman series. Evoking an essence of nostalgia by capturing obscure crops of scenes from the TV show and then doubling down on nostalgia by rendering them out using the 4 colour, dithering algorithms of the classic NES gaming console. I decided that this would be my first mini-project—to try and work out a way to plot these pieces.

It was not a simple process. First I had to perfectly vectorise the 120 x 120 pixel images and then hatch the fill of each coloured layer at exactly the correct interval to create solid pixel shapes that did not overlap each other. It was easier said than done and there were plenty of failed attempts. I have become so used to working digitally, where imagery can be pixel-perfect and aligned exactly, but what you see on screen is rarely precisely replicated when plotted, as I discovered. Of my 4 colours, I chose one of these to be the paper colour (grey in this instance) and then the other 3 colours would be gel pens.

Gel pens are generally quite good for plotting because they have a good flow of opaque ink meaning that they will show up even on coloured papers. However, each layer must be plotted individually and it is crucial to make sure that you zero your plotter pen back to home before starting to print a new layer. If your pen position is even 0.5mm off you will end up with colours overlapping.

Pen width is also a bit tricky. You can try to replicate in Inkscape how you think pens will behave but physically, pen stroke weights will vary. A 0.5mm weight pen isn't always exactly 0.5mm and things like the ink flow, plot speed etc can affect this. For example, Posca paint markers (fine PC-3M) say that their stroke weight is 0.9–1.3mm and whilst that variance might not seem like much, over even an A5 hatched area it can make an impact. Setting a hatch spacing of around 1mm is probably best in this instance but there will be an element of trial and error, so I recommend generating a test sheet. There's a great piece of software called Drawing Bot V3 which can do this for you based on your specifications, but it is not free so I have generated some SVGs here for you to download and test yourself for free: A4_Pen_Calibration.svg A3_Pen_Calibration.svg
After some experimentation and maths (not my strong suit) I eventually settled on a good balance. Using some A5 Gris Clairefontaine grey mixed media paper and more gel pens I plotted my first 'proper' printer-proof pieces.

You may see some areas where the line weight wasn't quite right but overall I'm happy with them as tests and feel confident enough moving forward to create some final pieces. I strongly recommend writing notes as you go along. In order to achieve these plots again I will have to replicate about 10 different steps with exact settings and if I change the type of pens I am using or the paper size I will have to tweak and adjust again accordingly.

One of the things I love about bringing my digital art to life physically is the re-introduction of 'happy accidents'. As a student, I spent a lot of time experimenting with printing techniques, screenprinting, lino etc and there was always an element of not quite being fully in control of the outcome which gave the whole process a certain magic. I've become so used to digital art being able to be perfect that the plotter has allowed me to enjoy embracing the imperfections of a physical print again.

And so, beyond its ease of use, setup and technical capabilities,the Uuna Tek H pen plotter A3—perhaps most importantly—brings a sense of magic, playfulness and excitement to the creative process. Watching your designs come to life as the plotter drives the pen around your canvas is nothing short of inspirational. Whatever your level I'd encourage you to jump in and get inspired. I'm super excited about the future of my creative practice now that I have this unique tool in my arsenal. You can check out how I progress with my plotting adventures via my Instagram @jim_a_g.